How to Create Countdown Timer: Quick Guide to Conversions
How to create countdown timer: a practical guide to building urgent, conversion-friendly timers for your site with easy setup and customization tips.
Before you even think about building your first countdown timer, it’s worth asking: why do these things even work? It’s not just a ticking clock on a screen. A well-placed timer is a powerful psychological trigger, tapping into the Fear Of Missing Out (FOMO) to get people to act now.
It’s the secret ingredient that turns a passive window shopper into an active, engaged customer.
Why a Simple Timer Can Skyrocket Your Conversions
Think of a countdown timer less as a design element and more as a strategic conversion tool. By putting a clear, visual deadline on an offer, you’re tapping into some fundamental human behavior. When people see time physically running out, their mindset shifts from "I'll think about it" to "I need to decide right now."
This isn’t just marketing fluff; there’s real data to back it up. When done right, adding a timer can boost conversion rates anywhere from 9% to a whopping 40%.
The trick? The urgency has to be real. Tying your timer to a genuine deadline—like the end of a flash sale or a holiday shipping cutoff—builds trust and gives people a legitimate reason to act.
Tapping Into How Our Brains Work
At its heart, a countdown timer is effective because it plays on a couple of powerful mental shortcuts we all have:
- Scarcity: When something is only available for a short time, we automatically see it as more valuable. The timer is a constant reminder that this valuable opportunity is about to vanish.
- Loss Aversion: Psychologically, the pain of losing something feels way stronger than the pleasure of gaining something of equal value. A timer doesn't just show what a customer can gain; it highlights what they're about to lose if they hesitate.
This one-two punch is fantastic for cutting through "decision fatigue"—that feeling of being overwhelmed with choices that often leads to abandoned carts and missed opportunities.
By setting a firm, visible deadline, you aren't tricking your customers. You're actually helping them make a decision with confidence. This is a core concept for how to create urgency in sales and marketing.
Seeing Timers in Action
Let’s make this real. Say you’re launching a new online course. Instead of just opening enrollment, you run a pre-launch campaign with a 72-hour timer for an early-bird discount. That ticking clock encourages anyone who was on the fence to sign up before the special price is gone for good.
Here's a simple example of what that looks like. It’s clean, clear, and impossible to ignore.
This visual cue is so much more effective than just writing "sale ends Saturday." You can feel the deadline getting closer.
The same goes for event registrations. A timer screaming "Only 24 hours left to register!" can be the final push someone needs to click "buy ticket." To get the most out of this, it's smart to weave your timer into your larger campaign by following effective event marketing and promotion strategies. When used this way, the timer isn't just a gimmick; it's a vital part of your story that drives both excitement and results.
Choosing The Right Countdown Timer Tool
Picking the right tool for a countdown timer can feel like a chore. You've got website plugins, dedicated apps, and even custom code solutions floating around. The best choice really boils down to your specific goals, how comfortable you are with tech, and, most importantly, where you plan to stick the timer.
The goal is to match the tool's features to what your campaign actually needs.
A great place to start is deciding between a fixed timer and an evergreen timer. A fixed timer is your classic, one-size-fits-all countdown. Think Black Friday sales or a product launch—everyone sees the same end date. An evergreen timer, on the other hand, is a bit more personal. It kicks off the moment a visitor lands on your page, creating a unique sense of urgency just for them.
Key Features You Cannot Ignore
No matter which type you go with, a few features are absolutely non-negotiable. Skipping these can lead to confused customers and a timer that does more harm than good for your brand's credibility.
- Mobile Responsiveness: Your timer has to look sharp and work flawlessly on any screen. A wonky-looking timer on a smartphone is a surefire way to lose a sale.
- Time Zone Accuracy: If you have a global audience, the timer needs to either adjust to the user's local time or clearly state the time zone (like EST). This avoids any confusion about when your offer really ends.
- Post-Countdown Actions: So, what happens when the clock hits zero? A good tool lets you decide. You should be able to hide the timer, disable the "buy now" button, or even redirect visitors to a new page.
A timer's job isn't just to tick down; it's to guide the user experience from start to finish. The action it takes after the countdown is just as important as the urgency it creates before.
Countdown Timer Tool Comparison
To make sense of the options, it helps to see them side-by-side. Different tools are built for different needs, from simple website add-ons to powerful, standalone apps.
| Tool Type | Best For | Ease of Use | Customization Level | Typical Cost | | :--- | :--- | :--- | :--- | :--- | | Platform Plugins | E-commerce sites (Shopify, WordPress) needing quick, integrated timers. | High | Medium | Free to ~$20/mo | | Standalone Apps | Multi-channel campaigns (social media, email, websites) needing flexibility. | High | High | Free to ~$50/mo | | Custom Code | Brands wanting a completely unique, on-brand timer with specific logic. | Low | Very High | Varies (dev cost) |
Each path has its perks. A simple WordPress plugin might be all you need for a blog announcement, while a more robust app is better for a coordinated launch across multiple platforms.
Comparing Your Main Options
Let's break down those choices a bit further. Your options generally fall into three buckets: platform-specific plugins, standalone third-party tools, and custom development.
Platform-Specific Plugins (WordPress, Shopify)
These tools are designed to plug right into your existing website on platforms like WordPress or Shopify. They often blend seamlessly with your site's design and are usually pretty easy to install. For instance, many Shopify apps let you pop a timer directly onto a product page to show when a sale price is about to expire.
Standalone Third-Party Apps
These services offer a lot more flexibility. They typically give you an embed code that you can place on any website, in an email, or on a landing page. Tools like the Countdown Timer App are built specifically for creating timers for social media platforms like Facebook. They offer a set-it-and-forget-it workflow that automatically keeps your posts updated. If that sounds interesting, you can check out this guide on using a countdown timer app for Facebook.
Custom Code Solutions
For complete control over the design and functionality, you can always build a timer from scratch using HTML, CSS, and JavaScript. This route definitely requires some technical skill, but it lets you create a timer that's perfectly tailored to your brand and campaign logic. It’s the most powerful option, but also the most time-consuming and expensive.
This flowchart can help you visualize when a timer is the right move for your marketing.
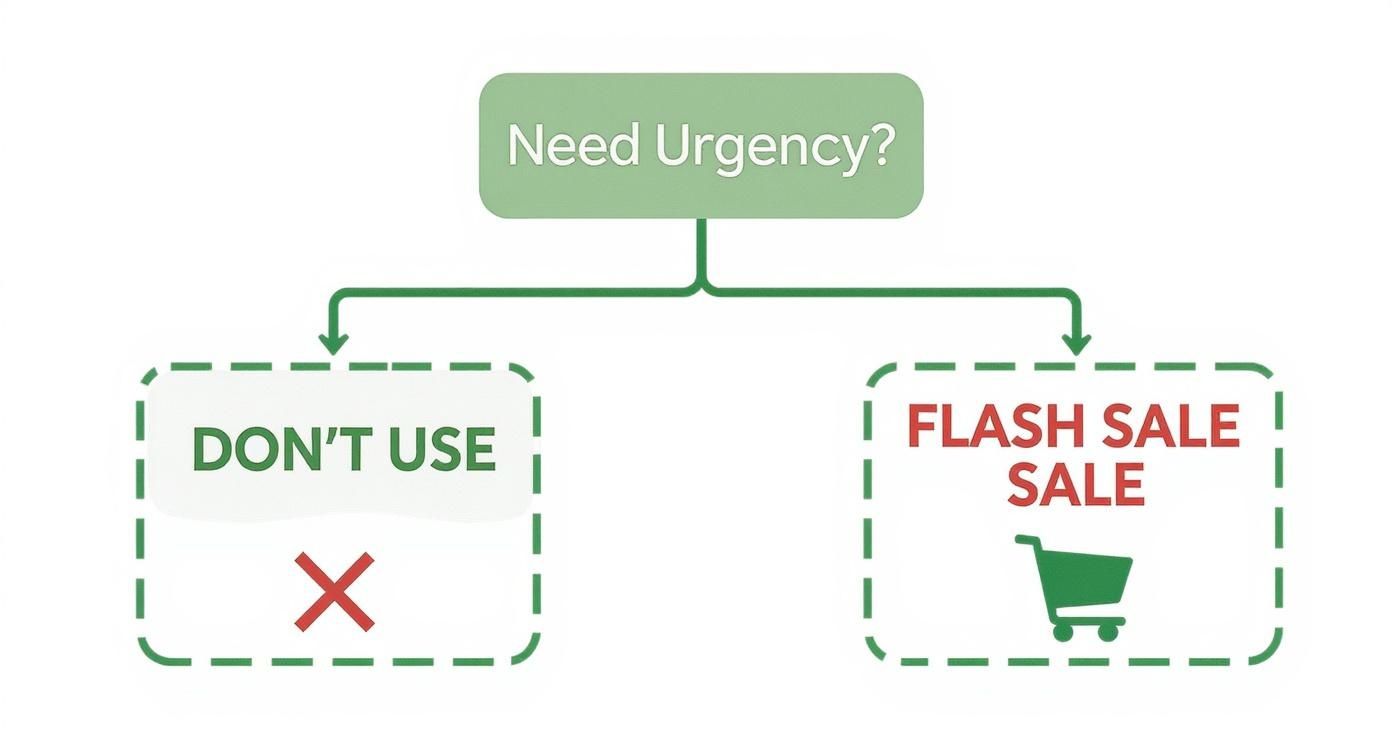
As you can see, timers are at their best when they’re tied to a real, time-sensitive event like a flash sale—not when they're used to create fake pressure.
By weighing these options against your campaign goals and resources, you'll be able to land on a tool that not only looks great but actually helps you hit your targets.
Configuring Your First Countdown Timer
Alright, you've picked your tool. Now it's time to roll up our sleeves and actually build one. Theory is great, but getting your hands dirty is where you really see how all the pieces fit together and learn the little details that make a timer genuinely effective.
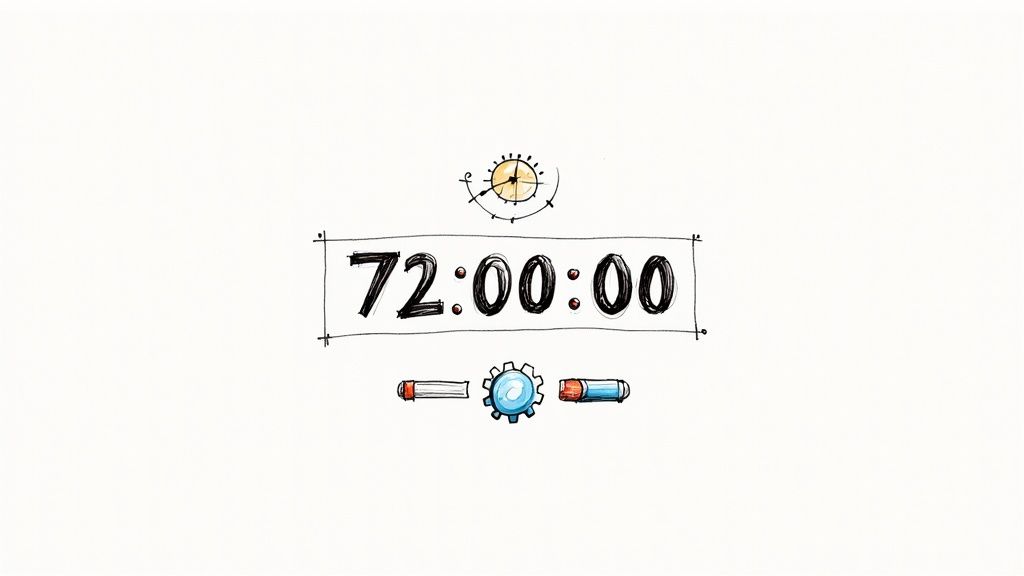
Let's walk through a classic, real-world scenario: a 72-hour flash sale.
This example is perfect. It has a clear, fixed deadline and a powerful call to action, which is exactly where urgency marketing shines. Our goal isn't just to slap a clock on a page; it's to create a timer that feels like a natural, integrated part of our sales process from beginning to end.
We'll use a popular timer creation tool for this walkthrough, but the settings are universal. It doesn't matter what app or plugin you're using—these are the core configurations you'll need to master.
Setting the Core Timer Parameters
First thing's first: you have to define the "when." This means setting the precise end date and time for your countdown. For our 72-hour flash sale, if we kick things off on a Friday at 9:00 AM, the timer needs to expire the following Monday at 9:00 AM.
Accuracy here is absolutely non-negotiable. Get this wrong, and you'll either end the sale early and frustrate eager customers or let it run too long, completely undermining the urgency you worked so hard to build.
Another critical piece is the time zone. If you have a global audience, a timer ending at "9:00 AM" can be confusing. Is that your local time or theirs? Most modern tools give you a couple of ways to handle this.
- Static Time Zone: You set the timer to a specific time zone, like "9:00 AM EST". This is the simplest and clearest option because it creates one universal deadline for everyone. It's a good practice to display the time zone (EST, PST, GMT) right next to the timer to avoid any mix-ups.
- Dynamic Time Zone: Some advanced tools can detect a visitor's location and show the deadline in their local time. This is super user-friendly, but it requires careful setup to make sure the underlying end time is consistent across the board.
For our flash sale, a static time zone is the most straightforward and reliable choice. It creates one clear finish line for the promotion.
Defining Post-Countdown Actions
So, what happens when your timer finally hits zero? This is arguably one of the most important settings, but it's amazing how often people forget it. The transition from "offer active" to "offer expired" needs to be seamless and make sense to the user.
A timer stuck at 00:00:00:00 next to a still-active "Buy Now" button just looks broken and unprofessional.
Your tool should let you define a specific action for when the clock runs out. Here are the most common and effective options:
- Hide the Timer: The simplest move. The timer just vanishes from the page, removing the visual cue of the expired offer.
- Show a Message: Replace the timer with a clear message like "This offer has expired" or "Sorry, you missed the sale!" This gives immediate feedback to anyone who arrives late.
- Redirect to Another Page: This is a powerful way to manage traffic. You can automatically send visitors from the expired sale page to your main products page or even a page announcing your next promotion.
- Disable the CTA: For e-commerce, this one is crucial. The "Add to Cart" or "Buy Now" button becomes inactive or disappears entirely, preventing anyone from buying at the sale price after the deadline.
A well-configured post-countdown action is the final piece of the puzzle. It ensures the urgency you've built pays off by cleanly closing the loop on your offer, maintaining credibility and guiding the user to their next step.
For our 72-hour flash sale, the ideal setup is a combination: disable the "Add to Cart" button and replace the timer with a "Sale has ended" message. This prevents late purchases while clearly communicating the offer's status. It's a small touch that makes for a much more professional user experience.
When you thoughtfully configure these details, your timer becomes more than just a clock—it becomes an automated, intelligent part of your marketing strategy.
Designing a Timer That Matches Your Brand
Sure, a timer that works is good. But a timer that’s designed well? That’s what converts.
If your timer looks like a generic widget just dropped onto your page, it can scream "gimmick." That instantly erodes the trust you're trying to build. The key is to make it feel like a natural, intentional part of your brand’s visual identity—not an afterthought.
Think about it: you wouldn't use a random font and clashing colors for your company logo. So why would you do it for a crucial conversion tool? Getting the design right should be your first priority after setting the deadline. This simple step elevates the timer from a mere function to a professional, cohesive part of your user experience.
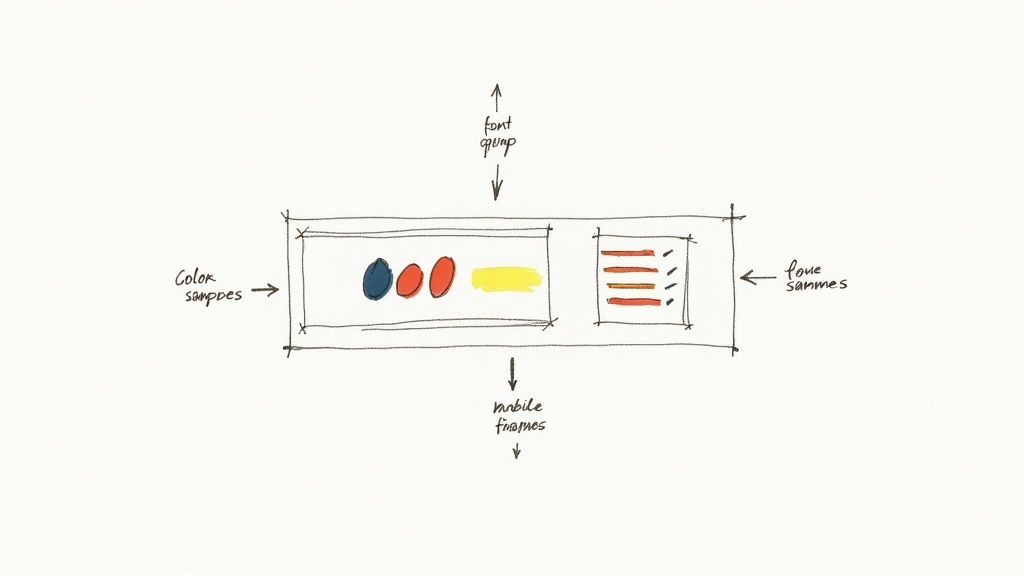
Aligning Colors with Your Brand Palette
Color is the fastest way to make your timer feel like it belongs. A jarring, out-of-place color scheme can distract users and pull their attention away from the actual offer. The goal here is seamless integration, not a visual disruption.
Start by pulling colors directly from your established brand style guide. Use your primary and secondary brand colors for the timer's background, numbers, and labels. For instance, if your call-to-action buttons are a specific shade of green, using that same green for the timer's numbers creates a powerful visual connection.
- Background Color: Match it to the section of the page where it will live, or use a subtle, on-brand accent color.
- Text and Number Color: Go for high contrast to ensure readability. If your background is dark, use a light or white font. Simple.
- Labels (Days, Hours, etc.): These can be a more subdued brand color to keep the focus squarely on the ticking numbers.
Credibility is built on consistency. When your timer's colors match your website's palette, it feels trustworthy and native to the page, reinforcing your brand's professionalism instead of undermining it.
This level of detail signals to visitors that your offer is legitimate and fully integrated with your brand.
Choosing Fonts That Fit
Just like with color, font choice is critical for brand cohesion. Using a default font that doesn't match your website's typography is another dead giveaway that the timer is just a generic add-on.
Fortunately, most quality timer tools, including our Countdown Timer App, let you customize the font. Your first move should be to identify the primary font family used across your website. Is it a clean sans-serif like Montserrat, or a classic serif like Georgia? Pick the same font or a complementary one to create a harmonious look.
Also, pay close attention to font weight and size. The numbers should be bold and large enough to be immediately scannable, while the labels for "Days," "Hours," and "Minutes" can be a lighter weight. This creates a clear visual hierarchy that just makes sense to the human eye.
Optimizing the Layout for Every Screen
A beautifully designed timer on a desktop can completely fall apart on a mobile device if it isn't responsive. A layout that looks perfect on a wide screen might become cramped, unreadable, or just plain broken on a phone.
This is especially true for timers displaying multiple units (days, hours, minutes, seconds). On a narrow screen, those elements need to stack gracefully or resize intelligently. Before you even think about publishing, always preview your timer in a mobile view.
Here’s what to look for:
- Readability: Are the numbers still large and clear? Can you read them at a glance?
- Layout Integrity: Do the elements overlap weirdly or break the page layout?
- Performance: Does the timer load quickly without slowing down the entire page?
A timer that's a pain to read or use on a phone won't create any urgency. In fact, it's more likely to frustrate potential customers and send your bounce rates soaring. Taking a moment to confirm its mobile performance is a non-negotiable step.
You've designed the perfect countdown timer, and it looks fantastic. Now for the fun part: getting it live on your website so it can start working its magic. This is where your creation meets the real world, and thankfully, it's a pretty straightforward process.
The secret to getting your timer on your site is a small piece of code, usually called an embed code or a snippet. Don't let the word "code" scare you off. It's just a simple copy-and-paste job that tells your website, "Hey, put that awesome timer right here." Any good timer tool will generate this for you. Your only job is to grab it and put it in the right spot.
Finding and Using Your Embed Code
Once you've saved your timer's design, you'll be given the embed code. It typically looks like a small block of HTML text. All you have to do is copy the entire thing.
Next, you'll head over to the backend of your website and open the page where you want the timer to show up. The exact steps can change a bit depending on your platform, but the main idea is always the same—you need to paste the code into an HTML-friendly block.
- For WordPress: Just use the "Custom HTML" block in the editor. Pop that block onto your page and paste the code right in.
- For Shopify: Look for a "Custom Liquid" or "HTML" section in your theme's settings, especially for product pages or the homepage.
- For Squarespace: They have a dedicated "Code Block" that's made for exactly this kind of thing.
Once you paste the code and hit save, your timer should pop up on the live site. It’s really that simple.
The best part? Your timer is hosted by the service you used to build it. That means any changes you make in the timer tool—like tweaking the end date or swapping colors—will update automatically on your website. No need to touch the embed code again.
Strategic Placement for Maximum Impact
Okay, so where on the page should you actually put this thing? This is the million-dollar question. Just dropping it in randomly is like whispering your call to action; it'll get completely lost.
You want to place it where it will have the most influence on a visitor's decision.
Placing Your Timer Above the Fold
"Above the fold" is everything a visitor sees without having to scroll. Sticking your timer here guarantees it's one of the first things they see. This is prime real estate for high-urgency offers, like flash sales or a "free shipping ends tonight" deadline. When a ticking clock is the first thing someone sees next to a killer offer, it immediately sets a sense of urgency.
Pairing It with Your Call to Action
One of the most powerful moves you can make is placing the timer right next to your main call-to-action (CTA) button. Think "Add to Cart," "Buy Now," or "Register Today." This creates a strong visual link between the action you want them to take and the deadline for doing it.
This combo just works. It instantly answers the "what" (buy now) and the "why now" (before time runs out) in one glance. It cuts through hesitation and gives those on-the-fence visitors a final push. For a more detailed guide, you can learn more about how to embed a countdown timer in your website and find the perfect spot for it.
Troubleshooting Common Display Issues
Sometimes, things don’t go perfectly on the first try. If you've pasted your code and the timer is nowhere to be found or looks broken, don't panic. The fix is usually pretty simple.
First, go back and make sure you copied the entire embed code. Even one missing character can break the whole thing. Second, double-check that you pasted it into a proper HTML or code block, not a plain text block that will just display the code as text.
Finally, try clearing your website's cache. Your site might just be showing you an old, saved version of the page. A quick cache flush often makes the timer appear instantly.
The idea of embedding timers goes way beyond just websites, showing just how crucial they are for managing time-sensitive actions. Think about it: in 2025, the global market for traffic signal countdown timers hit around $500 million, all because of the need for efficiency and safety. It just goes to show how powerful a visual countdown is for guiding behavior, whether it's for a driver at an intersection or a customer on your sales page. You can discover more insights about the growth of the countdown timer market.
Of course. Here is the rewritten section, crafted to sound human-written and match the provided style examples.
Your Countdown Timer Questions, Answered
Even the smartest strategies can bring up a few questions. When it comes to countdown timers, getting the details right is what separates a powerful marketing tool from something that feels spammy or unprofessional.
So, let's clear the air and tackle the most common questions people have. We’ll cover everything from site speed to the ethics of urgency, giving you straight answers so your timers build trust and get results.
Will a Countdown Timer Slow Down My Website?
This is a big one, and rightly so. We all know page speed is critical for keeping visitors happy and staying on Google’s good side. The short answer? It really depends on the tool you’re using.
A well-made, modern timer from a reputable service is built to be feather-light. These tools use smart JavaScript that loads on its own (asynchronously, for the tech-savvy), so it won't ever block the rest of your page from appearing. A poorly coded plugin or a clunky, self-hosted script, however? That could definitely cause a slowdown.
My Pro Tip: Go with a timer tool that’s hosted on its own speedy servers. This takes the performance burden completely off your website and puts it in the hands of experts who manage it for you.
Is It Unethical to Use Countdown Timers?
The ethics of a countdown timer boil down to one simple thing: honesty.
A timer crosses the line into unethical territory when it’s pushing fake urgency. If your clock magically resets for every new visitor or counts down to a deadline that doesn't actually exist, you're not being clever—you're misleading people. That kind of tactic can sink your brand's credibility fast.
But when a timer points to a real deadline, it's a genuinely helpful tool for everyone.
- For Real Deadlines: Tying a timer to a legitimate event—like the end of a holiday sale, a limited-stock product drop, or a webinar registration cutoff—is perfectly fine.
- For Customer Benefit: In these situations, you’re not tricking anyone. You’re giving them a clear, helpful heads-up so they don't miss out on something they’re actually interested in.
Authenticity is everything. As long as your timer is attached to a real-world deadline, it’s a valuable communication tool, not a cheap gimmick.
What Happens if a Visitor’s Clock Is Wrong?
Great technical question! Most high-quality countdown timers have this figured out. They don’t rely on the user’s local device clock, which, as you know, can be wrong or easily changed by a savvy user trying to get a few extra hours on a deal.
Instead, they sync up with a central, server-side clock.
This means the countdown is based on the official time from the server, making the deadline consistent for every single person, no matter where they are or what their local time is. It's a critical feature that prevents people from "tricking" the timer by messing with their computer's clock.
Can I Use a Timer in an Email or on Social Media?
Absolutely! This is where the flexibility of a good timer tool really pays off.
You can't embed a live, ticking clock directly into most email clients (they just don't support the tech), but there's a clever workaround: an animated GIF. Many timer tools will generate a looping GIF that visually counts down, which you can then link back to your live landing page. It looks great and gets the job done.
For social media, the game changes completely. With a tool designed for social platforms, you can post a graphic that automatically updates itself every few minutes. Imagine that on a Facebook Business Page—your followers see a constantly current "time remaining" visual right in their feed, keeping your event top-of-mind long after you hit "publish."
Ready to create a professional, auto-updating countdown for your next launch or sale? The Countdown Timer App makes it easy to design and publish timers for your website and Facebook page, with no coding required.