Create Your Perfect Template for a Ticket for an Event Today
Discover the best template for a ticket for an event. Easy to customize and perfect for any occasion. Get started now!
A great template for a ticket for an event is your first real chance to make a lasting impression. It's so much more than just proof of purchase—it’s a powerful branding tool that sets the entire tone for what's to come. Think about it: this small piece of paper or digital file is often the very first tangible thing an attendee interacts with related to your event.
Why a Great Ticket Template Matters
Consider your event ticket the opening act. A generic, plain-text ticket hints at a generic event. A thoughtfully designed ticket, on the other hand, builds instant excitement and broadcasts professionalism. It’s a sneak peek of the quality and attention to detail you’ve poured into the main show.
From Pass to Keepsake
A truly fantastic ticket design moves beyond its basic function. When you get it right, it becomes a memorable keepsake that people hang onto long after the lights go down. This is especially true for big moments like concerts, festivals, or special ceremonies. A ticket that looks and feels special is far less likely to end up in the trash.
For instance, a ticket for a vintage film festival might lean into retro fonts and classic movie imagery. A tech conference ticket could rock a sleek, minimalist design with a QR code as the centerpiece. The whole point is to make sure the ticket's visual identity perfectly matches the event's vibe. This kind of consistency strengthens your brand and makes the entire experience feel cohesive right from the start.
A Powerful Marketing Tool
Your ticket template is also a subtle but incredibly effective marketing asset. It’s a prime opportunity to show off your brand's personality and deliver key info in a way that actually engages people. Plus, a well-designed ticket is inherently shareable—attendees are way more likely to snap a photo of a cool-looking ticket and post it on social media.
Your event ticket isn't just an administrative tool; it's the first piece of the event experience. It should communicate the value, theme, and professionalism of your brand before the attendee even walks through the door.
This kind of organic sharing can seriously amplify your reach. If you're looking for ways to promote your event on Facebook, encouraging attendees to share their tickets can create a powerful ripple effect, drumming up buzz and driving those crucial last-minute sign-ups.
Ultimately, putting a little extra time into a solid ticket template pays off big time. Here’s why:
- It Builds Anticipation: A professional design gets people genuinely excited for what’s ahead.
- It Reinforces Brand Identity: It instantly tells attendees what your event is all about.
- It Improves the Attendee Experience: It gives people clear information in a format that’s actually nice to look at.
Building the Foundation of Your Ticket
Before you even think about firing up your design software, the first move is to lay a solid groundwork. Creating a great event ticket template starts with a simple blueprint—gathering and organizing every last piece of essential information your attendees will need.
Think of it like getting all your ingredients prepped before you start cooking. It’s the best way to make sure nothing critical gets left on the cutting room floor.
First up, let’s nail down the non-negotiables. These are the core details that every single ticket absolutely must have, no exceptions.
- Event Title: The name of your event, front and center. It should be impossible to miss.
- Date and Time: Be specific. Include the full date and the exact start time.
- Venue and Location: Don't leave room for error. A full, clear address is key to avoiding attendee confusion.
Once you’ve got those basics locked in, you can start thinking about other elements that add real value. A QR code, for instance, isn't just a cool techy feature anymore; it’s essential for a smooth, secure check-in process. Sponsor logos are a great way to give your partners some much-needed visibility, and adding your social media handles is an easy win to encourage people to connect with you online.
This simple sketch shows how you can organize these key pieces for a ticket that’s both clear and effective.
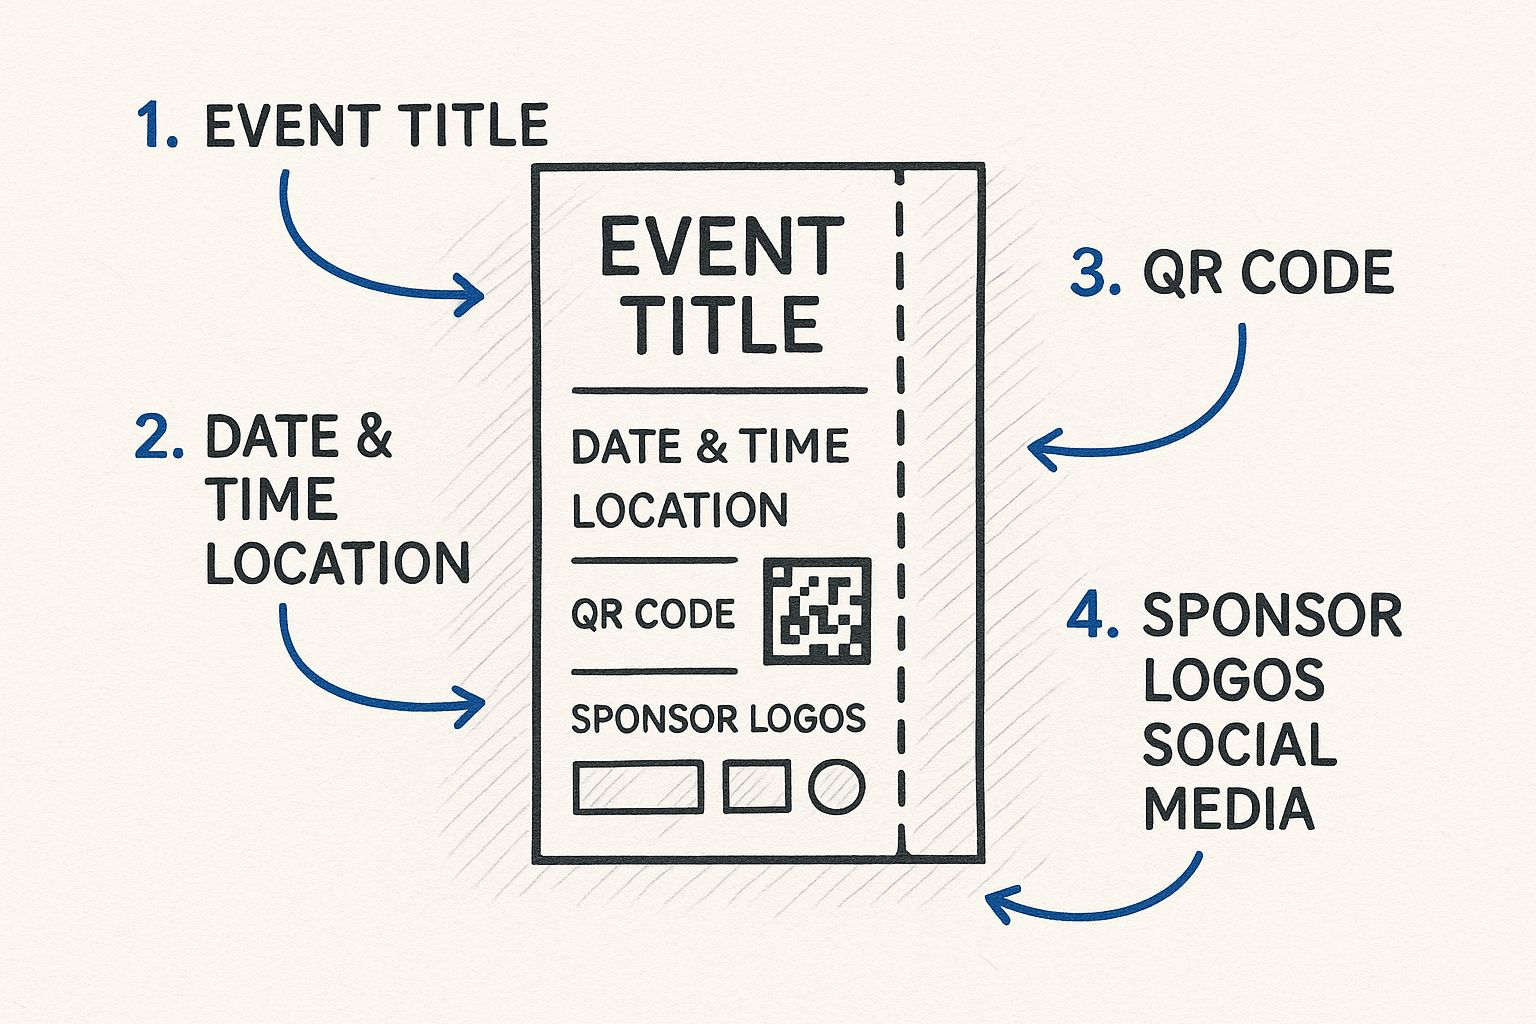
As you can see, a successful template creates a clear visual hierarchy. It makes it dead simple for your guests to find what they need in a single glance.
Choosing Your Ticket's Format
Next, you'll want to decide on the actual dimensions, whether it’s a physical ticket or a digital one. The standard size for a physical ticket is often around 5.5 x 2 inches, which is perfect for slipping into a wallet. But if you need to pack in a detailed schedule or want to give your sponsors more prominent branding, a larger format might be the way to go. This one choice will influence your entire layout.
Getting these details right is more important than ever. The global events tickets market was valued at roughly $68.5 billion in 2023, and that number is only expected to climb. It really shows how a well-designed ticket is a critical part of the whole event experience. You can find more insights about the event tickets market online.
A good ticket blueprint doesn't just list information—it creates a visual path for the attendee. The most important details should grab the eye first, guiding them naturally from the event title all the way down to the QR code.
Mastering the Visual Design Elements
Alright, you've got the "what, where, and when" locked down. Now for the fun part: making your ticket look incredible. This is where your event's personality truly shines, transforming a simple piece of paper into a powerful branding tool and a keepsake.
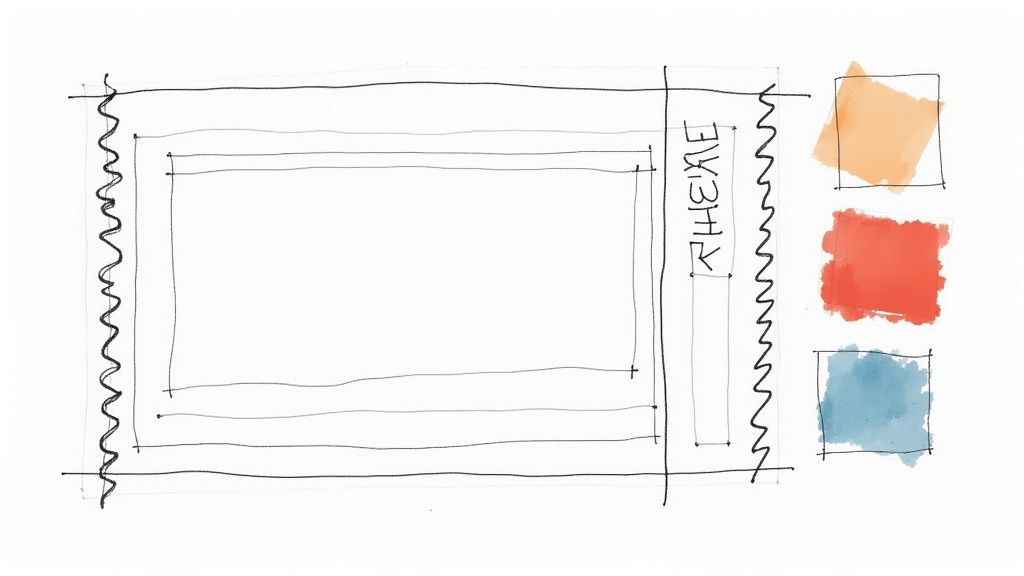
The first thing people will react to is your color palette. Colors set a mood instantly. A high-energy music festival practically screams for bold, vibrant hues, while a corporate gala calls for a more elegant and subdued scheme. If you're new to this, diving into an essential guide to color theory is a great starting point.
Choosing Typography and Imagery
Next up is typography. The fonts you choose have to walk a fine line between being stylish and being readable. That cool, decorative script might look amazing for the event title, but it's a terrible choice for critical info like the date or address.
To keep things clean and clear, stick to these simple rules:
- Stick to Two Fonts (Max): A common pro tip is to use one font for your headings and another for the body text. Any more than that, and things start to look chaotic.
- Readability is King: Make sure your font size is large enough to be read easily, especially for those crucial details. No one wants to squint to figure out the venue.
- Match the Vibe: Pick fonts that feel right for your event. A clean, modern sans-serif works perfectly for a tech conference, whereas a classic serif font fits right in at a formal dinner.
When it comes to logos and images, use them strategically—don't just slap them on the canvas. High-quality visuals are non-negotiable. A pixelated logo or a blurry background photo instantly cheapens your entire design and reflects poorly on your event's professionalism.
Whitespace is not empty space; it's an active design element. Using it effectively is the key to creating a clean, balanced, and professional-looking ticket template. It gives your content room to breathe and guides the reader's eye to the most important information.
Don't be afraid to leave some areas of your ticket empty. Clutter is the enemy of good design. For instance, a classic mistake is shrinking text just to cram in more sponsor logos, making the whole thing unreadable. A much better approach is to create a dedicated, well-proportioned section just for partners.
This ensures your ticket remains professional and user-friendly. It’s the same principle behind creating visually stunning countdowns that grab attention without feeling overwhelming. The goal is to create a design that looks intentional and polished.
Choosing the Right Design Software
First things first, let's talk tools. You absolutely do not need to be a professional designer to create a great-looking ticket template. The best tool for the job really just depends on your budget, how comfortable you are with design software, and how fancy you want to get.
There are a ton of powerful, user-friendly options out there that can give you a seriously professional result.
For Quick and Easy Designs
If you're a beginner or just need to get something done fast, platforms like Canva are a lifesaver. Seriously. Their drag-and-drop interface is incredibly intuitive, and they have a massive library of pre-made templates you can tweak. You can honestly knock out a polished ticket in a matter of minutes, even with zero design experience.
Stepping Up to Professional Tools
Now, if you're the type who needs total control over every little detail, you’ll want to look at professional-grade software. Adobe Illustrator is the undisputed industry standard for a reason. It gives you unlimited power over typography, vector graphics, and layout, making sure your ticket is 100% unique. It definitely has a steeper learning curve, but for a truly custom piece, the results are unmatched.
What if you just need something simple? Even everyday tools can work in a pinch. You can actually create a basic, functional ticket using Google Docs or Microsoft Word. If you go this route, just focus on a clean layout, easy-to-read fonts, and make sure your logo looks sharp.
The key isn't having the most expensive software. It's about picking the tool that matches your skills and what your event actually needs. A clean, simple design that's well-executed will always beat a complicated one that's a mess.
Let's not forget that the online event ticketing world is huge. The U.S. market has seen massive growth, mostly because everyone has a smartphone. This just goes to show how important it is for your ticket—whether it's simple or complex—to look good both in someone's hand and on their screen. You can dig into more stats about the growth in online ticket sales to see just how big this market is.
Ultimately, the software you choose is going to shape your entire workflow and the final ticket. Here’s what to think about:
- Ease of Use: How quickly can you get up and running with it?
- Customization: Does it give you the creative freedom you're looking for?
- Cost: Are you looking at a one-time purchase, a monthly subscription, or is it free?
Getting Your Ticket Ready for the Real World
Alright, your design looks amazing. Now it's time for the final, crucial step: preparing your ticket for its debut, whether that’s in someone’s hand or on their phone screen. Getting this part right ensures a smooth experience for every single attendee.
You'll mainly be dealing with two file types: PDF and JPG. For physical tickets, a high-resolution PDF is non-negotiable. It keeps all your text and logos perfectly sharp, no matter how much they're zoomed in on. If you're going for a truly polished look, you might even consider using professional event ticket printing services to really make your design pop.
On the other hand, for anything digital—like an email attachment or a social media graphic—a lightweight JPG or PNG is your best friend. These files are much smaller, meaning they load quickly and look great on a screen.
Prepping for Print
If you're printing your tickets, a couple of industry terms can save you a major headache down the line. Trust me on this.
- Bleed: This is just a little extra bit of your design that goes past the actual edge of the ticket. Why? Because printers aren't perfect. This tiny margin ensures that even if the cutting blade is a fraction of a millimeter off, you won't get any ugly white slivers along the border.
- Crop Marks: Think of these as little guide lines in the corners of your file. They show the printer exactly where to trim the paper, resulting in a clean, perfectly sized ticket every time.
Nearly all design software will have simple checkboxes to add bleed and crop marks when you export. Always, always use them. It’s a small click that makes a huge difference in the final product.
Optimizing for mobile isn't just a suggestion—it's essential. A digital ticket that requires pinching and zooming is a frustrating experience. A clean, single-column layout with large, legible fonts ensures your attendees can pull up their ticket and get scanned in without any friction.
Nailing the Digital Delivery
When you’re designing for digital, your mantra should be "mobile-first." People will be pulling up these tickets on their phones, often while standing in a crowded line.
Keep the layout simple and vertical. No one wants to be pinching and zooming just to find their barcode. Speaking of which, make sure your QR code is big, bold, and has plenty of white space around it so scanners can read it without a hitch.
Want to take it a step further? You can add interactive elements to build excitement right up to the last minute. For instance, you can embed a countdown timer in a website or email that ticks down to showtime. Paying attention to these final details will make sure your ticket template is ready for anything.
Got Questions About Your Ticket Template?
Even with the best design tools at your disposal, a few questions are bound to pop up when you're putting together a template for a ticket for an event. Nailing these details early on can save you a ton of headaches later. Let's walk through some of the things event organizers ask about the most.
One of the first things you'll have to decide is the ticket's size. While there isn't one single "right" answer, 5.5 x 2 inches is a super popular and practical choice. Why? It's simple: that size slips easily into a wallet or pocket, so attendees aren't stuck carrying something awkward.
Of course, if your event needs more real estate for things like a mini-schedule, sponsor shout-outs, or a map, you might bump it up to something like 6 x 2.5 inches. It's all about finding that sweet spot between giving people all the info they need and keeping the ticket convenient.
Is a Unique QR Code Really Necessary for Every Ticket?
Yes, one hundred percent. In this day and age, putting a unique QR code on every single ticket is non-negotiable for running a smooth, secure event. It makes the check-in process lighting fast, which means shorter lines and happier guests right from the start.
But more importantly, it's a massive security win. Unique codes are your best defense against duplicates and fraud, making sure only legitimate ticket holders get through the door. As a bonus, it gives you rock-solid attendance data you can use to plan your next event. You can find plenty of free online generators to create them.
How Can I Create Pro-Looking Tickets Without a Big Budget?
A professional-looking ticket has less to do with how much money you spend and more to do with smart, clean design. You can absolutely get that premium vibe without breaking the bank.
It all starts with a clean, uncluttered layout. Don't be afraid of whitespace! It makes your design look intentional and way easier to read.
Here are a few other budget-friendly pointers:
- Find Great Fonts: You don't need to buy expensive fonts. Sites like Google Fonts have a massive library of professional, free options.
- Keep Your Colors Simple: A limited, on-brand color scheme always looks more polished than a design throwing every color of the rainbow at the wall.
- Choose Better Paper: If you're printing physical tickets, upgrading to a slightly heavier paper stock (like cardstock) makes even the simplest design feel more substantial and high-quality.
When it comes down to it, the most critical information is always the same: event name, date, start time, and the full venue address. You also can't forget the ticket price (if there is one) and a unique ID, like a seat number or barcode. If you miss any of these, you’re just creating confusion before the event even begins.
Ready to build excitement for your next event? With Countdown Timer App, you can create stunning, auto-updating countdowns for your Facebook page or website in minutes. Drive urgency and keep your audience engaged. Start for free today and see the difference.


